Setting up User Syncronisation in Azure AD
Introduction:
Setting up a user provisioning sync (SCIM protocol) is the recommended option when you want to link an Azure Active Directory to the Phished application. By creating an Enterprise application in Azure, you can select individuals and/or security groups that need to be provisioned/uploaded ("pushed") to Phished. The information Phished uploads is extracted from default filled-in attributes.
Configuration requirements:
You must have (i) an account with "Owner" privileges on the Phished platform, and (ii) a Microsoft Azure administrator account.
Before you can add any recipients, you need to add and validate the in-scope email domain(s). The in-scope domains are the domains used by the recipients you want to add. Talk to us for instructions on how to do this.
STEPS – Create an Enterprise application in Microsoft Azure and set up the user provisioning
Open the Microsoft Azure portal.
Open the left sidebar and click on “Azure Active Directory”.

3. In the left sidebar, click on "Enterprise applications".

4. Create a new application using the "+ New application" button.

5. Click on "+ Create your own application".

6. A new pop-up will appear, open it and fill out the required details:
• "What's the name of your app?": You can use your own naming standards or simply use Phished - User provisioning
• "What are you looking to do with your application?": Select "Integrate any other application you don't find in the gallery (Non-gallery)".
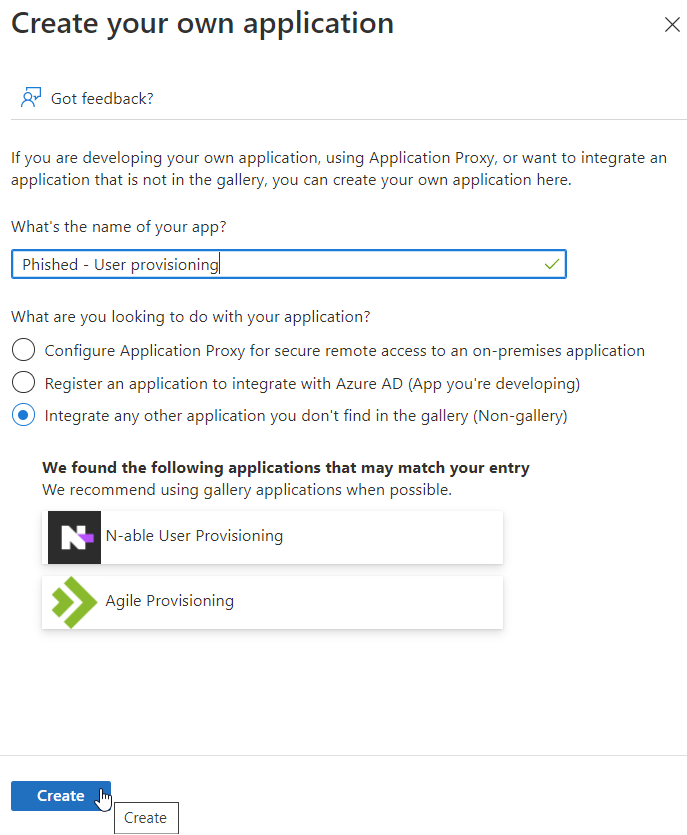
7. Click “Create”.
8. Once the application is created, you can immediately start selecting the group, groups, and/or individual users you want to provision as a recipient to the Phished platform. This you can do by clicking on “1. Assign users and groups”.
(1 – click on “1. Assign users and groups”)

(2 – click on “+ Add user/group”)

(3 – click on “None selected”)
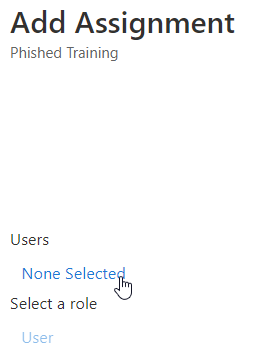
(4 – search for & select a security group/groups, and/or individuals)

(5 – assign the selected user(s)/group(s)) - click on the “Assign” button

(6 – example of the selected group when you navigate back to the “Phished – User provisioning” Enterprise application dashboard)

9. Once you have selected all the required users, navigate towards the "Provisioning" tab (in the left sidebar) to complete the User provisioning configuration.

10. Click on "Get Started".

11. Select your preferred “Provisioning Mode” to provision recipients. Recommended: "Automatic".

12. Next, you will have to fill in the URL and token generated by the Phished platform (see step 6), under "Admin credentials".
• URL: https://recipients.phished.io/api/scim/v2
• Secret token: Paste the unique authorisation token created on the Phished platform or supplied to you by us.

13. Click on "Test Connection". If you receive the below message, great!

14. Click “Save”.

15. The final step is to actually launch/start the provisioning. You do this by clicking on "Start provisioning" under the Provisioning tab.
